2018-06-04

Build a weather app with Angular 6

Because we all know the world needs more weather apps.

In this tutorial I'm going to walk through the process of creating a web app from scratch using Angular 6. This will show everything you need to build a fully functioning, although slightly useless, web application. You can see the finished application running here. To keep things simple there will be no server code required to run the application. It can be deployed as a completely static website. All the code can be downloaded from github.

To make it easy to follow I'll include links to the specific checkin in GitHub for each change. This makes it easy to see the exact changes at each step.

Prerequisites

Before getting started there are few things you need to install and setup. If you already have setup Angular CLI you can skip this step.

You will need to install nodejs. Download the LTS version. You need Node.js version 8.9 or higher and npm version 5.5 or higher. If you already have node installed you can verify your versions using 'node -v' and' npm -v' from the command line.

Next you need to install Angular CLI globally using npm.

npm install -g @angular/cli@6.0.7

Finally you need a text editor. You can use any editor you are comfortable with. Personally I use VS Code.

Once everything is installed you are ready to get started and create a new project.

Create the project

View changes in GitHub

Angular CLI provides an easy way to create new Angular project. This is a really easy way to get a project up and running quickly. Open a command line window and run the following command to create the project.

ng new weather --skip-tests --routing --style less

Running this will also pull down all the dependencies automatically with npm. Once complete you will have a full Angular project that you can run. From the command line run the following command.

ng serve --open

Your browser should open http://localhost:4200/ and you should see this. Initial default Angular project running in chrome browser

Make some changes

View changes in GitHub

With the code open in your editor and ng serve running you can make changes in a file and see them reflected straight away in your browser once you save. Let's try that now.

Open app.component.html file and delete everything there. Replace it with this.

                
    <div>{{city}}</div>
    <div>{{weather}}</div>
    <div>{{temp}}</div>
    <router-outlet></router-outlet>


Open app.component.ts file and replace the AppComponent class with this.

                
    export class AppComponent {
        city = 'Vancouver';
        weather = 'Sunny';
        temp = 23.0;
    }


In your browser you should now see this. Basic Angular binding in action.

What's going on?

This shows a very simple example of Angulars interpolation binding syntax. The double curly braces in the html file, for example {{city}}, will take whatever value is stored in the AppComponents city property and display it in the html file. Change the city property in AppComponent and save the file. This new value will now show in your browser.

Let's check the weather

View changes in GitHub

You can look outside to see the weather but that's not much use to the fancy web application you are building. Your application is going to need an API to check the weather. Luckily for us there are plenty to choose from. I picked Open Weather Map API because it shows up first in Googles results.

It has APIs for current weather, 5 day forecast and lots more. We are going to keep things simple and just use the current weather API. You will need to get an API key to be able to call the API. It's free so get one now.

To help keep our components simple it is generally a good idea to abstract any API interactions into a service class. This class can then be used by the component classes.

Generate a service

We can use Angular CLI here to save us some typing. Run the following command to generate the service class.

ng generate service weather

This creates a WeatherService. We will put all of the API calls in this class.

To make the API call we have to add some dependencies. We will use Angulars HttpClient module to make the http calls. This needs to be added to the app.module.ts

                    
        import { HttpClientModule } from '@angular/common/http';
        ...
        imports: [
            BrowserModule,
            AppRoutingModule,
            HttpClientModule
        ]


Now that we have that added we can use the HttpClient module in the WeatherService class. We are going to call the API and extract the data points we need in our app. The API returns a lot of information but we only need some of it. Call the API and see what comes back or just look at the documentation.

A note about API keys

The weather API uses an API key to authenticate each call. You must have a valid key to be able to call the API. Don't use my key. It's easy to get your own. These keys are rate limited so if there are too many requests made with the same key they will start failing.

If you were making a proper application and wanted to use this API you would normally make the API call to the weather API from your own server. That way you don't need to expose the API key on the client side. However since this is just a tutorial and this is a free key it doesn't really matter too much.

Making the call

View changes in GitHub

The HttpClient get method returns an observable. There is lots of good information on observables already so I won't go over that here. We are going to turn the response of the API call into an object that we can use in directly in our component. This shows the parts of the response that we will use.

        
    {
        "weather": [
            {
                "description": "clear sky"
            }
        ],
        "main": {
            "temp": 18.58
        }
    }


In the WeatherService we use the RxJS map function to extract only the pieces of the response object we want and turn them into a new object. Later on we'll add a concrete class for this but for now we don't need a specific type.

        
    return this.httpClient.get<any>(apiCall).pipe(
        map(resp => {
            const weather = resp.weather[0];
            const temp = resp.main.temp;
            const x = { weather, temp };
            return x;
        }));


Then in app.component.ts we can use the new object returned by the WeatherService. We subscribe to the response of the API call. When the API call succeeds it will update the weather and temp properties with the values returned from the API.

        
    ngOnInit() {
        this.weatherService.getCurrentWeather(this.city).subscribe(x => {
            this.weather = x.weather.description;
            this.temp = x.temp;
        });
    }


Try running this now and you should see something like this. Component showing API results

So far so good. Although if anything goes wrong with the API call we are in trouble. Update the city name in app.component.ts with an invalid city name. Component showing failed API results with console error

View changes in GitHub

To better handle this we can add an error handler to the subscription. Then whenever the API returns a failure we can deal with the error. All non 200 http status responses will throw an error and need to be handled. To keep it simple we will just log the error to the console and show a message to the user. You should now see this in your browser. Component showing failed API results being handled correctly

If you like this tutorial and would like to be notified when I post more tutorials please sign up here.

Or just send an email to anthonyoconnor@gmail.com.

Time for some refactoring

View changes in GitHub

Ok so we've proved the API calls work correctly. We can extract the data we need and display it to the user. If anything goes wrong the user sees a nice error.

Putting the code directly in app.component.ts is fine to start with. However it doesn't make it easy to add other pages to the app later. We can tidy things up a bit and make it easier for adding new pages later. Angular uses Components as the basic building blocks of an application. You can, initially at least, think of every component as being a page in your application.

Create a city component using Angular CLI and move all the logic from app.component.ts into it. Run the following command.

ng generate component city

This adds a new folder called city along with the city component files - city.component.ts, city.component.less and city.component.html. Copy all the code from AppComponent into CityComponent and likewise from app.component.html into city.component.html. City.component.html won't need the router-outlet tag. What this tag is used for will be explained in the next section.

To display the new city component update app.component.html like this.

                    
        <router-outlet></router-outlet>
        <app-city></app-city>


Finally you need to add the CityComponent to the app.module.ts file under declarations. Run the application again using ng serve. Everything should look the same as before.

Where to now?

View changes in GitHub

Angular supports having routes to your components. Routes are just urls that Angular maps to a particular component. Routes also allow us to pass parameters to a component. In our case we are going to map the route http://localhost:4200/city/Vancouver to the CityComponent and get it to load weather for the city specified, in this case Vancouver.

This is why we included the --routing parameter when initially creating the project. This created a file called app-routing.module.ts. Open this file now and update the routes as follows.

        
    const routes: Routes = [
      { path: 'city/:city', component: CityComponent }
    ];                 


This creates a route called city that will load the CityComponent. This particular route is special in that it also has a parameter specified by :city. We will be able to load this parameter in the CityComponent and call the weather API with the appropriate city name.

Remember we put app-city into the app.component.ts file. Take this out now. From now on the <router-outlet></router-outlet> will show whatever component is needed for the current route. Run ng serve again and go to http://localhost:4200/city/vancouver . This will now load the CityComponent.

Make use of the route parameter

View changes in GitHub

When a route includes a parameter link such as in the 'city/:city' route we can load this parameter in the component. One place to do this is in the ngOnInit method. First we include the ActivatedRoute class in the CityComponent constructor. In ngOnInit the parameter can be read as follows.

this.city = this.route.snapshot.params['city'];

This is great, now you load a different city by typing the city name in the url. For example http://localhost:4200/city/vancouver or http://localhost:4200/city/new%20york. To help with testing add these urls to app.component.ts under <router-outlet></router-outlet>

        
    <a routerLink="/city/vancouver">Vancouver</a>
    <a routerLink="/city/limerick">Limerick</a>


What's a router link? It's just Angulars way of linking to specific routes within the application.

View changes in GitHub

So now click on one of the links. Strange. It does not change the city shown in the component. Why is that? Well ngOnInit only runs once when the component is loaded. Since going to the /city route would just load the CityComponent again and its already loaded ngOnInit does not get called again. Instead we can subscribe to changes on the ActivatedRoute.

        
    this.route.paramMap.subscribe(route => {
        this.city = route.get('city');
        //Do something with the city value;
    }


Now clicking on links changes the city as expected.

My poor API key

View changes in GitHub

Depending on the API you are using it may not be feasible, or a good idea, to be hitting the API constantly during development. You might have to pay per API call. Or more likely the API is being developed by another person and it's not ready to use yet. So what can we do?

We can mock out the API calls and give canned responses to the UI. This will help us work on our UI without worrying about the API being available.

Note: this isn't a replacement for unit tests. It's just an easy way to check that your UI looks the way you think it will based on responses from an API. There are also some other benefits such as mimicking delays we will see later.

Create a new class called DevelopmentWeatherService in the same file as the existing WeatherService class. Add the same methods that exist in WeatherService, in this case getCurrentWeather(city: string) .

We could create an interface here to ensure they both have the same methods but really it's not worth the bother here.

getCurrentWeather in DevelopmentWeatherService needs to return the same data as the real WeatherService.

                    
        @Injectable()
        export class DevelopmentWeatherService {
            getCurrentWeather(city: string): Observable {
                const weather = { description: 'Rain' };
                const temp = 12.2;
                const x = { weather, temp };
                // of(x).pipe(delay(2000))
                // allows you to mimic delays
                // that can happen when you 
                // call the real api.
                return of(x).pipe(delay(2000));
        
                // throwError can mimic errors 
                // from the API call.
                // return throwError('Fail');
            }
        }            


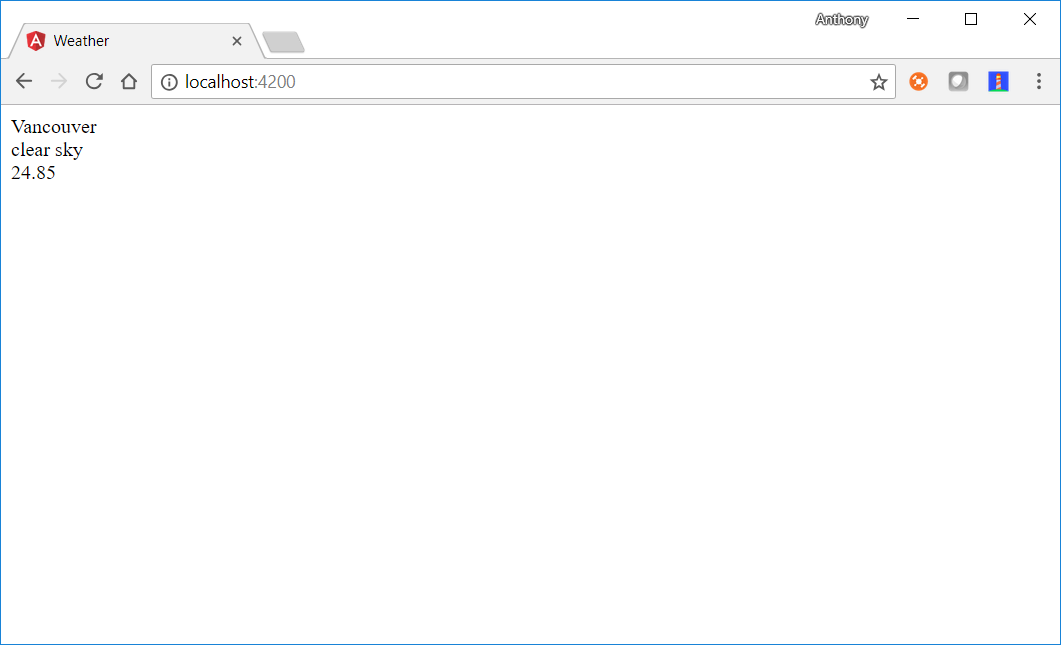
As well as just returning mock data we can also mimic delays just like if the real API was being called. We can also mimic failures. This makes it really easy to see what the UI will look like in these cases.

Now that it exists, how does this get instantiated at runtime?

I like to create a config service that has a flag to specify whether to use the real API or the fake one. This config class is also useful for storing other things like API keys or other settings. Create a new service using Angular CLI just like before.

ng generate service config

Open the config.service.ts file and add a public property called inMemoryApi.

public inMemoryApi = true;

At runtime we can use this flag to decide which version of the WeatherService to instantiate. This requires a few steps. Add this code to the end of the weather.service.ts file

            
        export function weatherServiceFactory(httpClient: HttpClient, configService: ConfigService) {
            let service: any;
            
            if (configService.inMemoryApi) {
                service = new DevelopmentWeatherService();
            } else {
                service = new WeatherService(httpClient);
            }
            return service;
        }
            
        export let weatherServiceProvider = {
            provide: WeatherService,
            useFactory: weatherServiceFactory,
            deps: [HttpClient, ConfigService]
        };        


There are a few things going on here. Angular uses dependency injection which means when you specify a service in the constructor of a component Angular creates the instance for you and passes it in. Normally this is one to one. Up to now when we specify the WeatherService as a dependency in the WeatherComponent constructor Angular creates an instance of the WeatherService and passes it in when the WeatherComponent is created. We can override this default behaviour with a provider.

The weatherServiceProvider basically says when Angular provides a WeatherService use the weatherServiceFactory to create it. This is good for us since we can now use our config service in the weatherServiceFactory function and decide which service we want to instantiate.

Finally we need to include the service provider in the app.module.ts file under providers.

providers: [weatherServiceProvider]

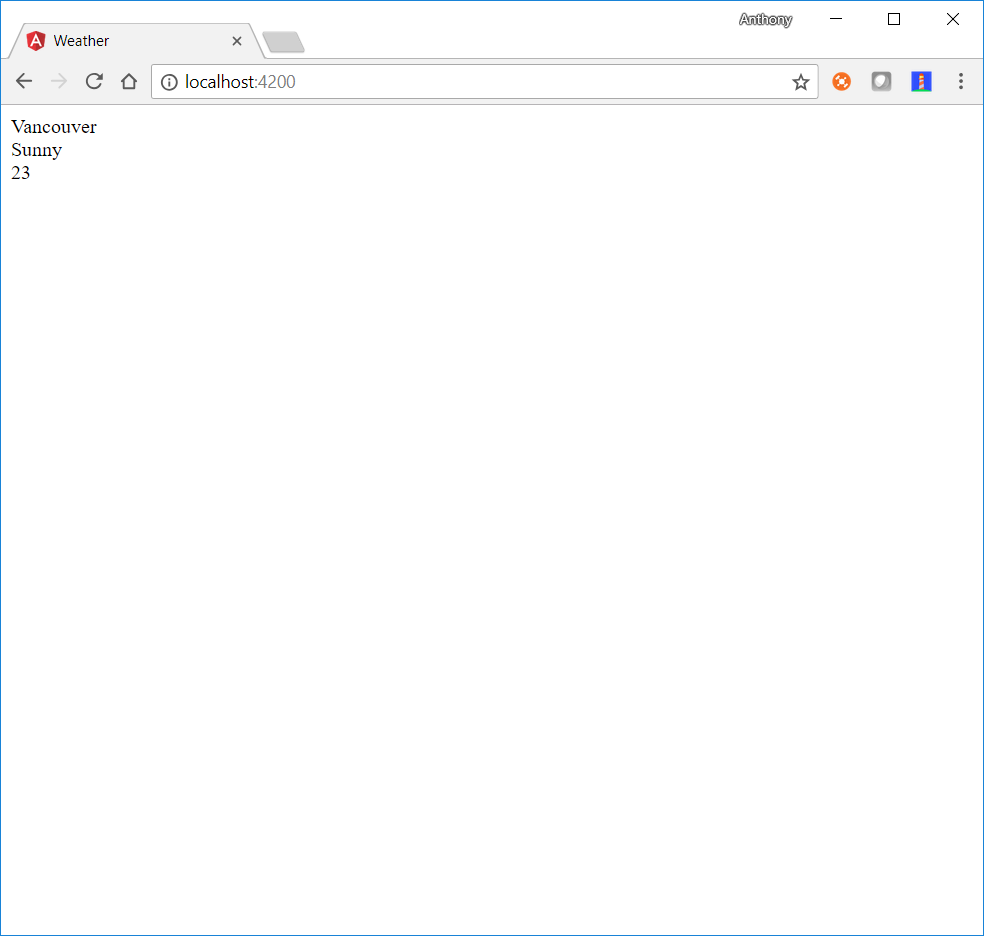
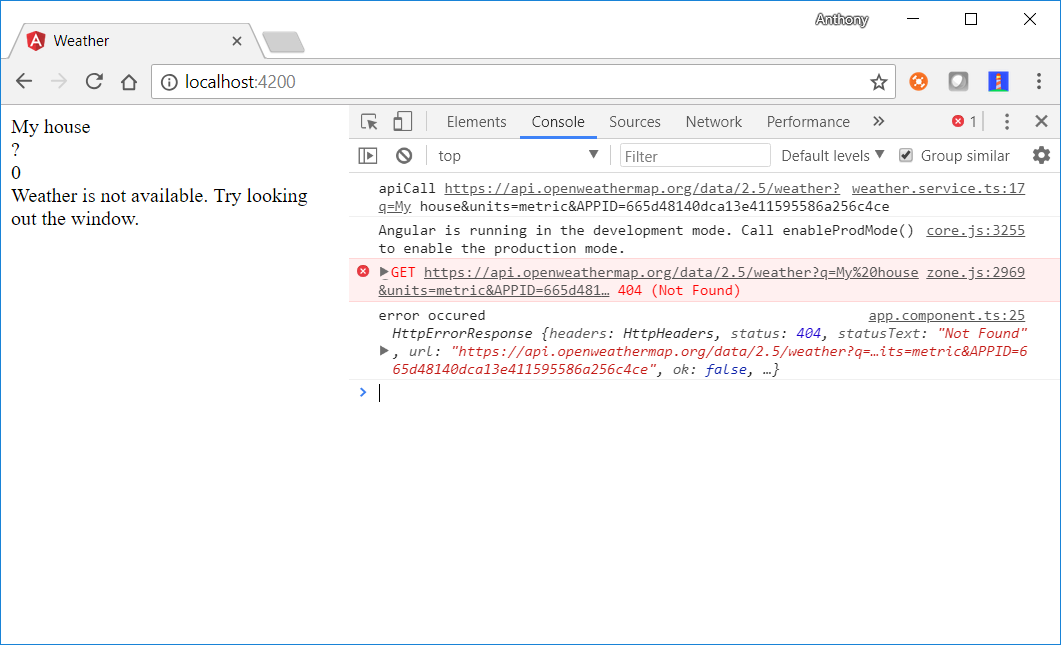
Set the inMemoryApi flag to true and run ng serve. Now when the city component it loaded it will show whatever data you have in the 
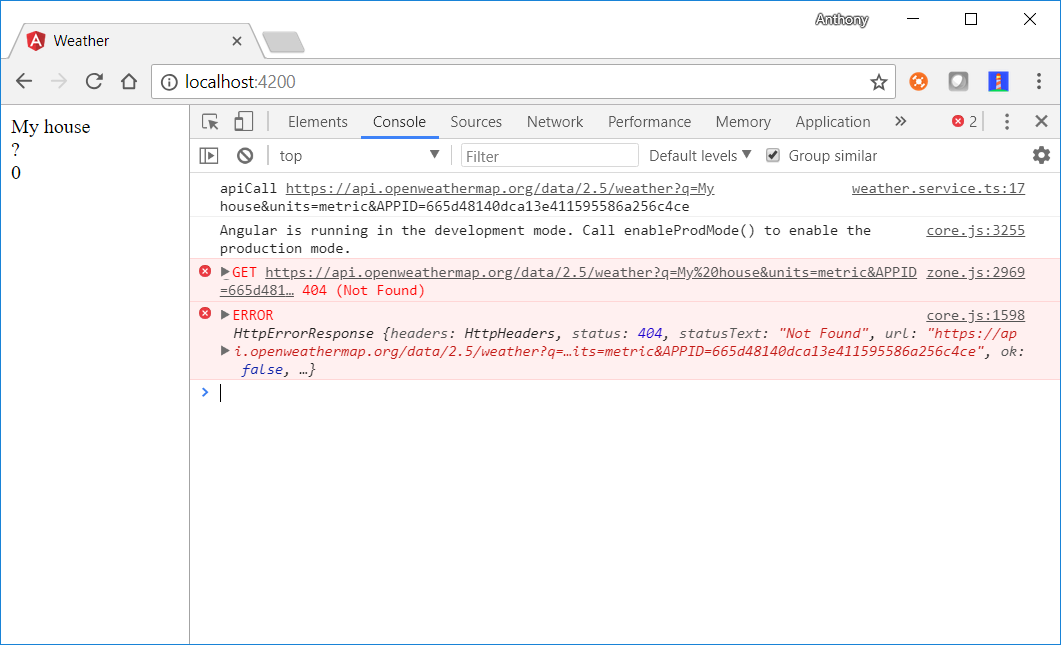
DevelopmentWeatherService. Modify the DevelopmentWeatherService to throw an error and see what happens.

Tidy it up a bit

View changes in GitHub

Let's make it a bit better to look at. There are two main types of styling we can apply. Global styles and component specific styles. Global styles can be added in styles.less. Component specific styles can be added in the less file that was created when we created the component; city.component.less in our case.

Anything specified in the component less will only affect the component itself. The styles will not leak out and affect other components.

Pretty it up whatever way you want. This is what my version currently looks like. Basic styling of city component.

Add some new cities

View changes in GitHub

Being able to enter the cities in the url is fine but we can make it easier for the user. Let's give the user a way to enter cities and later on we will store them so the user doesn't need to enter them every time they run the app.

Add a new component called AddCity.

ng generate component addCity

Same as before this will generate add-city.component.ts and its associated files. We add a route called add-city and specify to load this new component. In app-routing.module.ts add the new route.

{ path: 'add-city', component: AddCityComponent }

View changes in GitHub

To get input from the user add an input box to the add-city.component.html file.

  
        <input type="text" placeholder="Vancouver" [(ngModel)]="newCity"> 
        <div>{{newCity}}</div>  <!-- This will show it works --> 


[(NgModel)] binds the specified value in the html file to a property in the add-city.component.ts file. Therefore we need to add a public newCity property to the AddCity component. Go ahead and run it with ng serve. You will see the following error.

Can't bind to 'ngModel' since it is't a known property of 'input'. ("<input type="text" placeholder="Vancouver" [ERROR ->][(ngModel)]="newCity">

To be able to use NgModel you must first import the FormsModule in app.module.ts as follows.

            
        import { FormsModule } from '@angular/forms'; 
        imports: [
            FormsModule // Add this
        ],


Now try running it again with ng serve, go to http://localhost:4200/add-city and you should be able to type something in the input box and see the value shown under the input box. Basic form binding.

Ok, an input box on its own isn't much use. Add a button and we will use it to call the API and check if the city exists. We can reuse the existing API. If we call it and it succeeds then the city exists, otherwise the city couldn't be found. In the add-city.component.html file add the button and a click event.

<button (click)="addCity()">Add</button>

View changes in GitHub

Add a failed flag to the add-city.component.ts file and this can be used in the html file to show if a city cannot be found.

<div *ngIf="failed">Could not add the city.</div>

Add this method to the add-city.component.ts and call the weather service as before.

Failing to find a city.

What could go wrong?

View changes in GitHub

This works but there are some issues. Generally calling an API will take some time. The user could click the button multiple times if there is no feedback that the search is ongoing. Let's use our development service to help out and demonstrate this happening. Add a delay of 5 seconds to the API call in DevelopmentWeatherService.

return of(x).pipe(delay(5000));

Add a searching property to the add-city component. We will set this to true when the addCity method is called. Then set to it back to false when the search completes, either due to success or failure. To make use of this flag add the following to both the input control and the button control.

[disabled]="searching"

This will prevent the user from clicking the button or changing the input once the search begins. In a real production application you would likely add some sort of loading icon to indicate a search is ongoing. Disabled inputs while searching.

View changes in GitHub

If we find a city that exists then we can just direct to that city to indicate success. To do that we need to reference the router and redirect

this.router.navigate(['/city/' + city]);

I want lots of cities

View changes in GitHub

Right now you can enter a city name and see it, then go back and enter another city. But I don't want to have to enter cities all the time. It should save the cities I enter. Let's create a new service to do this.

ng generate service cityStorage

First off just store an array of cities in this service and add to it when the user searches for city. This works fine while the website it running but if you close the site and open it again everything is gone. We need to store the information more permanently.

We can use local storage to store bits of information in the browser. This can be accessed when the application runs to load anything stored there. Local storage can only store strings so we have to convert the array of cities to a string first. We can convert the array to a JSON string and save that to local storage.

localStorage.setItem("cities", JSON.stringify(this.cities));

Likewise when we need to load it we load the string from local storge and parse the JSON back to an array.

const existingCities = JSON.parse(localStorage.getItem("cities"));

View changes in GitHub

That takes care of the problem of saving and loading the cities. Now we need to update the application to look for this at startup. When the application loads with no url we will direct to a new component.

ng generate component startup

Don't forget to update the routes in app.routing.module.ts to include the new component.

{ path: '', component: StartupComponent }

This component can now check the city storage service to see if there are any cities stored. If so direct to the first one in the list, otherwise just go to add-city.

                    
        export class StartupComponent {
            constructor(private cityStorage: CityStorageService, private router: Router) {
                if (this.cityStorage.cities.length === 0) {
                    this.router.navigate(['/add-city/']);
                } else {
                    const defaultCity = this.cityStorage.cities[0];
                    this.router.navigate(['/city/' + defaultCity]);
                }
            }
        }


From one city to the next

View changes in GitHub

Ok, we are getting places. But once we have a city displayed we have no way to get to the next city without going an adding it again. We need a way to go to the next city and back. To keep things simple we just add a previous and next button to the UI. Rather than having the logic for this in the city component it will be better to keep this logic in the city storage service. It can figure out what the next and previous cities are.

Since the cities are stored in an array we just need a simple lookup to find the next city in the array or the previous one. We always pass in the current city so the city storage service doesn't need to keep track of which city is current displayed.

I like pictures

View changes in GitHub

It's nice to be able to see a picture to fully describe the current weather instead of having to read words. So let's add some images to make this app really professional looking.

The API can return a lot of weather codes but they are nicely grouped together so it is easy for us to map them to an image.

I went ahead and drew some pictures for each group. Nice aren't they?

Hand drawn picture of a Cloud Hand drawn picture of fog Hand drawn picture of lightning Hand drawn picture of a moon Hand drawn picture of a moon hidden behind a cloud Hand drawn picture of a sun Hand drawn picture of a sun hidden behind a cloud Hand drawn picture of a rain cloud Hand drawn picture of a snow cloud Hand drawn picture of a window. For when the weather is unknown

Before using this images I think a bit of refactoring is in order. Let's add a concrete class, WeatherModel to represent the weather data and an enum to store the Weather type. We can then use this enum to determine which image to display.

            
        export class WeatherModel {
            constructor(readonly type: WeatherType, 
                readonly description: string, readonly temperature: number) {
                }
            }


Since the weather codes returned by the API are grouped together it is easy to assign our own enum based on the id as shown here.

            
        if (weatherId >= 200 && weatherId < 300) {
             return WeatherType.lightning;
        }
        if (weatherId >= 300 && weatherId < 600) {
            return WeatherType.rain;
        }
        // One for each group returned by the API.


In city.component.ts we can use an Angular switch statement to decide which image to display. One little trick here is that you will not be able to use the WeatherType enum directly in the template unless you add a reference to it in the CityComponent first. This is because the template can only access properties that exist in the component class itself.

WeatherType = WeatherType

Once that is done the template can be updated like so.

            
        <div [ngSwitch]="weather.type">
            <img *ngSwitchCase="WeatherType.cloud" src="assets/cloud.png" alt="cloud">
            <img *ngSwitchCase="WeatherType.fog" src="assets/fog.png" alt="fog">
            ...


See how we can directly use WeatherType.cloud in the template. The development weather service also comes in handy here since you can set the response appropriate weather type to ensure your pictures are displaying correctly.

View changes in GitHub

One final piece here is that when the status of clear is returned it should show either a moon or the sun depending on when sunset occurs.

My poor API key ... again!

View changes in GitHub

Now that I can navigate back and forward between different cities to see their current weather the API gets hit every time a navigation occurs. In most places the weather doesn't change drastically minute to minute so it is probably a good idea to cache the API results rather than hitting the API every time. Now be aware that caching itself isn't necessarily hard. Generally it is determining when to invalidate that cache is the hard part. Since this is just a tutorial we are going to keep it super simple. We will cache in memory only. This means that if you refresh the app it will hit the API again. However while the app is running it will only every hit the API once per city. And yes, if you leave the app open and running for a day you will get yesterday's weather. I can live with that.

Go ahead and open the WeatherService. The implement the cache just add an array of WeatherModels. Now whenever getCurrentWeather is called simply check if the data already exists. If not then call the API can add the response to the array.

            
        getCurrentWeather(city: string): Observable<WeatherModel> {
        const existing = this.weatherModels.find(w => w.city.toLocaleLowerCase() === city.toLocaleLowerCase());
        if (existing) {
            return of(existing);
        }
        
        ...
        return this.httpClient.get(apiCall).pipe(
            map(resp => {
                ...
            const model = new WeatherModel(city, 
            getWeatherType(weather.id), weather.description, temp,
            new Date(sunrise), new Date(sunset));
        
            this.weatherModels.push(model);
        
            return model;
            }));
        }      


What's left?

Obviously it is very close to perfection now. But I suppose we can tidy it up a few things. First add some style.

Lastly we can use the decimal pipe to format the temperature. This is just in case the API returns more decimal places than we care about.

<div class="temp">{{weather.tempature | number:'1.1-1'}}&#8451;</div>

It's done. Best app ever!

Feel free to take it from here and add some more features. Here are a few suggestions.

Hopefully you learned something along the way that will be useful to you. Contact me if you have any issues or questions.

If you liked this tutorial and would like to be notified when I post more tutorials please sign up here.

Or just send an email to anthonyoconnor@gmail.com.